Showing posts with label natural. Show all posts

Thursday, August 16, 2012

Tutorial - How To Make an Herbal Oil Infusion on the Fast Track

New Tutorial

Herbal Oil Infusion - The Fast Track

Normally when making Herbal Oil Infusions I would leave the herbs or flowers in the oil on a sunny windowsill for a couple of weeks, even a month, stirring occasionally, pressing the old herbs and adding new. That's the best way to do it.

BUT, I needed a fast-track way to have some lovely herbal infused oil..well, actually, floral-infused oil by Sunday morning. It's Thursday! Uh Oh! 

 The cure?  I have mixed my flower tops in the oil just as I would for a long-term infusion, but have decided to slowly and gently heat them in a heat-proof glass container atop a double boiler.  The glass container is not touching the water, so that only the steam reaches the herbal mix.  I am keeping the water at the lowest simmer that will make a small amount of steam. 

I will let this infuse all day today.  I'll cool, press the floral mix, add new flower heads, cover again with the strained and pressed oil, and steam all day tomorrow. On Saturday I'll strain and press the oils. 


On Sunday I will use my newly created Infused Oil to make a lovely sugar scrub for a party that afternoon.  

I will let you all know how I like the results, or better yet, how the ladies like the results when they use their scrubs at home after the party. 

 This is a 2-Day Project, so allow yourself enough time to enjoy the process. 


 HOW TO MAKE an HERBAL OIL INFUSION

on the

THE FAST TRACK

 In this Recipe I am making a Lavender, Red Rose and Chamomile Infusion. You may substitute the flowers and/or herbs of your choice.

INGREDIENTS

2 cups dried herbs or flower heads

2 cups organic extra virgin coconut oil (76 or 96 degree)

(substitute almond, grapeseed or olive oil if coconut oil is not available, do not use blended vegetable oils such as cooking oil)

Water


SUPPLIES

Heat-Proof Glass Container (I am using a large 3 qt measuring cup)

Medium to Large Pot 

(should be large enough to hold glass container high enough to avoid the water and snug enough so that the container will not slip during the process)

Wooden Mixing Utensil

Funnel or Large Bowl

Sieve

Cheesecloth or Unbleached Muslin (unbleached cotton if that's what you have)

Clean DRY Glass Container with Lid (mason jar, clean dry mayo jar, etc.)

Large Rubber Band

RECIPE 

DAY 1

Fill your pot half way with cool water, turn on high heat and bring to boil. 

Turn heat to medium low, and adjust to just a low simmer. 

In your large heat-proof glass container, add 1 CUP ONLY of your herbs/flowers and pour all of the coconut oil over top

(coconut oil may not all come out of container, if that's the case, invert the container atop the mixture while its steaming. very shortly the oil will melt and you'll be able to get it out)

Stir to blend. 

Carefully place glass container in the top of the pot full of simmering water, being sure that the top of the water does not touch the bottom of the glass container. 

Allow the mixture to steam over SLOWLY simmering water for 6 hours, replacing water as it evaporates.

Allow to cool off enough to work with by hand. 

Place a single layer of unbleached cheesecloth, muslin or cotton over the container

Secure with a rubber band

Carefully turn the glass container upside down over the large bowl

Use a funnel to work with a smaller bowl

Allow the container to remain upside down, covered with the cloth, until all the oil drains into the second bowl

When all the oil has seeped into the second bowl, its time to Press

To Press the herbs, wrap the strained mixture of herbs/flowers in a large piece of muslin, cheesecloth or unbleached cotton, OR use a large unbleached reusable tea bag or cloth sack and fill with the flower mixture.  Tie securely with cotton string or hemp cord.

Place the wrapped mixture in your sieve over the bowl or use another clean DRY bowl if you like.

Press the wrapped mixture down against the sieve with your wooden utensil, a mallet, or (and this is what I do)  place a heavy object such as a stone mortar/pestle or a second smaller but heavy bowl atop the wrapping and weight it with crystals or other heavy objects. 

BE SURE that the object or utensil that you use is CLEAN and BONE DRY! You don't want to get any water into your infusion, this can end up causing you mold problems and ruining all your work. 

Allow all the remaining oils that you can squeeze from the herbs/flowers to drain into the bowl. 

Now start all over again.....

 If you are going to wait until tomorrow, then cover your container and place in a cool dry place, but NOT the refrigerator. 

DAY 2

In your makeshift double boiler bottom pot, again, heat 1/2 pot water to boiling. Reduce heat to a slow simmer.

Place your saved, strained and pressed oil, in your heat-proof glass container, over the water, but not touching. 

Add 1 CUP of the herb/flower mixture

Stir to blend.

Allow to steam another 6 hours, replacing water in the pot when needed. 

Stir occasionally. 

After 6 hours:

Remove from heat,

Cool to touch

Strain and Press same as on Day 1

Transfer to a CLEAN and BONE DRY glass container

Cover with a clean and BONE DRY lid, secure. 

Now you are ready to use your New Herbal Oil Infusion in your soaps, homemade skin care creams, or even in cooking!

Pat yourself on the back...you've done a great job!

AND you've made an all natural, good for you, good for the Earth, product that you can be truly proud of!

Please...let me know how your Infusion turned out. 

Experiment with different oils, herbs, flowers, etc.

Hope You Had Fun!

IMPORTANT TIPS

Never use a metal container. 
Never boil or overheat your mixture. 
Make sure to keep checking your pot to be sure there's enough water to produce steam.
KEEP WATER OUT OF YOUR MIXTURE AT ALL TIMES

Shelf Stable for Approximately 6 Months.


Wednesday, May 30, 2012

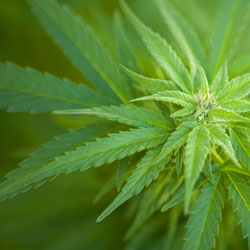
Just in case you happen to be wondering..HEMP SEED BUTTER is The BEST all around stuff on the face of the Earth.

I have a patch of excema on my elbow (pretty sure I've developed a wheat allergy) and I couldn't find anything that worked well.  Not even RX really worked for more than a day or two. 

BUT by accident while fooling around with my soap-making ingredients, I've found out that a little HEMP SEED BUTTER is the way to go. Not only has it softened up the area but its nearly gone! Its the best skin softener I've ever used too! 

It can be a bit heavy so using at night is what I would recommend for large areas, but for hands and face, just a dab goes a long way. 

A Miracle Plant...those Native Americans knew what they were doing! Thank you Hiawatha :)
 

I got mine here: http://www.etsy.com/listing/69354704/1-oz-hemp-seed-butter?ga_search_query=hemp&ga_search_type=user_shop_ttt_id_5812882

Thursday, May 10, 2012

NEW Barefoot Sandals Today

Barefoot Sandals

 Boho Hippie Style


Wear them on the beach, in the back yard, around the house, wherever!

I made these Barefoot Sandals with high grade super soft hemp so that they are comfy all through the day and night. Seriously, you could fall asleep with them on and not even realize it. 

I've used semi precious genuine Turquoise, wooden beads and glass. Some are wrap around, and some not. All are fully adjustable to fit Plus Size as well as Petite.

Find them in our Etsy Shop or check out the SHOP tab above. 

I had fun making them, I hope you fun wearing them. 

PEACE,

jo 


Thursday, March 29, 2012

How To Make Your Own Toothpaste

Making your own Toothpaste is Easy ~ Sugar-free, Tasty, and it Works Great!

Homemade Mint Toothpaste

This is all that you need:

2 tablespoons 76 degree coconut oil
3 tablespoons baking soda
1/2 small packet of stevia powder (or ground natural stevia leaf)
20-25 drops of peppermint oil ***(use spearmint oil if you don't like a spicy taste)

1. Mix all ingredients together in a small bowl, using a fork.

*** Start out with about half of the amount of peppermint oil and see how you like it. Too much peppermint oil for your taste and you'll end up with something that you will consider too spicy to use.


Variations


This is all you need:

Cinnamon ~ Omit the mint oil and substitute a few drops each of cinnamon and clove oil. You can use powdered cinnamon and clove, but expect the paste to be a little bit gritty. I find it best to use less at the beginning and add little bits at a time as cinnamon and clove tend to be strong and spicy, depending upon the brand you have at home.

Lavender Vanilla ~ Omit the mint from the original recipe and substitute ground lavender flower heads. A drop or two of pure vanilla extract adds body to this recipe.


Experiment with your favorite herbs and spices. Have fun and brush, brush, brush!

HINTS and TIPS

If you don't have 76 degree Coconut Oil you can use a higher degree, but just be sure that you use the kind that is solid at room temperature. If you try to use denatured or fractionated Coconut Oil it will be too liquid and will not thicken at all. Coconut Oil is an excellent base for homemade pastes...i think you'll love it. Coconut Oil will melt at 76 degrees so the toothpaste becomes liquid when you brush, and coats well. The nature of coconut oil is not the same as with most vegetable oils and it will not leave any oily or greasy feeling in your mouth. It will feel fresh and clean.

Tuesday, March 27, 2012

Just Finished Jade Filled Bottle Necklace

Natural Hemp Jade Filled Glass Bottle Necklace Wood Beads Adjustable Handmade FREE SHIPPING
zoom
Natural Hemp Jade Filled Glass Bottle Necklace Wood Beads Adjustable Handmade FREE SHIPPING Natural Hemp Jade Filled Glass Bottle Necklace Wood Beads Adjustable Handmade FREE SHIPPING Natural Hemp Jade Filled Glass Bottle Necklace Wood Beads Adjustable Handmade FREE SHIPPING Natural Hemp Jade Filled Glass Bottle Necklace Wood Beads Adjustable Handmade FREE SHIPPING Natural Hemp Jade Filled Glass Bottle Necklace Wood Beads Adjustable Handmade FREE SHIPPING

Jade, a sacred stone in the East, is widely used as a healing stone providing for a long and healthy life, as and one that will help you attract love and positivity into your life. Jade is often given to the one you love as an aid in ensuring their affections. It is also said to bring luck in finance, helping to bring money into your life. Overall, jade carries a very positive vibration into all that you do in your life.

Inside this little corked bottle you will find both Korea's Jade and New Mountain Jade chips. Korea's Jade is a lovely aqua color, light and airy looking, while New Mountain Jade is deep and rich in color. Both carry all the traits of jade within them, and the mix of light and dark is especially powerful.

I have woven a natural soft hemp necklace around this powerful little bottle and adorned the length of it with decorative natural wood beads. The bottle itself is wrapped in raffia of natural and green and nestled within a cradle of knotted hemp. There are two additional strands of both light and dark jade chips hanging from the neck of the bottle just above the cork.

With a bead and loop closure, the necklace is adjustable at 18, 20 and 22 inches,so that you can wear it shorter or longer as you choose.

The glass bottle measures approximately 2 inches tall by 1 diameter at the bottom. The cork adds an additional 1/8 of an inch at the top when fully inserted. A snug but removable wooden collar at the top of the bottle allows you to open the bottle and insert a small parchment with your written intentions upon it should you so choose.

As always, extensions are available free of charge, just specify the additional length needed.

SHIPS FREE within the Continental US.

NOTE

To Remove Cork:

Gently twist and lift the wood collar from the top of the bottle
Move the top of the hemp cradle away and to one side of the cork, being careful not to slip the bottle out of the cradle.
Gently but firmly pull the cork up and out

To Reattach Cork:

Insert cork tightly into bottle neck
Gently and delicately move the top strands of the hemp cradle over and around the top of the cork and spread the 4 lengths of hemp strands at even intervals around the bottle neck
While holding the strands in place, slip the wood collar back over top of the cork, over the strings, and press down firmly as far as it will go, flush with the top of the bottle neck.

HELPFUL HINT

If you do not intend to remove the cork, you may want to put a VERY SMALL amount of glue on the edges of the cork before re-inserting. This is ONLY if you do not intend to EVER remove the cork again. When using glue, be very careful not to allow it to touch the hemp fibers as it will stiffen them and create an unsightly coating.

IMPORTANT NOTE: Suggestions given herein are for informational purposes only. Please consult your Healthcare Professional when attempting to treat any illness or condition. We do not recommend the ingestion or consumption of any herbal solution or preparation for pregnant or lactating women, or for children. Your health is your most precious asset...always take the utmost care.